Saturday 28 June 2014

guest room mood board

Not too much is happening here, other than painting, painting, painting. We are getting there though, and wall wise we only have the verandahs left. And then some windows, and doors and railings. But we are getting there.

To occupy my mind I have been planning on decorating the downstairs guest room. Until now it was painted in Antique White USA, and had a queen and a single bed in there. Total.
It is quite a big room, has no built in storage at this stage, french doors out onto the bottom verandah, and a window that is also under the verandah. We have guests semi regularly, sometimes for a weekend or for longer stays and it is quite nice that they can be downstairs and have their own space. The single bed is great for the family and friends with kids.

Our guests, as well as coming to see us, also come for the beach, so we want to bring that relaxed, beachy, coastal feel throughout our house and into the guest bedroom, but without screaming Beach!

1. 2. 3. 4. 5. 6. 7. 8. 9.
Some of the artwork and cushions might change a little, (sadly especially the mandala, it might be a little over budget for the guest room, but maybe for our room!) and the bedside tables are definitely white, not pink! We own the drawers, I'm going to have a go at the headboard with some linen. The hat stand is for towels and clothing until we have some hanging storage. Maybe some hooks on the walls would work too. The floor mats are for our wooden floors and to stop sand.

I'm on holidays now-thank goodness!-and we have some visitors coming next week, so I'm going to start the headboard this weekend. Wish me luck!

Monday 16 June 2014

house painting

It's so exciting to come home from work each day to see what else the painters have done while we've been out at work. And we love how it is looking.

First coat 
First coat-all the rest is the old blue
We wanted to keep the blue, but just tone it down to be more greyish blue. We live within walking distance from the beach, it is our 'beach house', and the blueish colour fit with the relaxed coasty house we have, and life we live. But it's really toned down the bright sky blue that our house was. It doesn't stick out quite as much and it feels like a much calmer colour. And day by day we are painting over the remaining yellow with a nice bright white. It's funny-mostly the blue doesn't look too different until you compare it to another unpainted part, when it is obviously different.

The wall with the window has 2 coats, the wall facing is still unpainted.
You can see some of the new colour just above the railing for a comparison.
We will have the painters for a few more days, and then L and I will keep going on the bits we can do ourselves-the low walls and the verandahs.

Old blue, with our old yellow railings but white eaves
Can't wait to change the rusted lights!
We painted the downstairs front wall through the week, and also the verandah railings white out the back while the scaffolding was up, and are about to start the side.

PS-We also need to replace our hot water heater as of today! GAH! 

Monday 9 June 2014

painting the railings

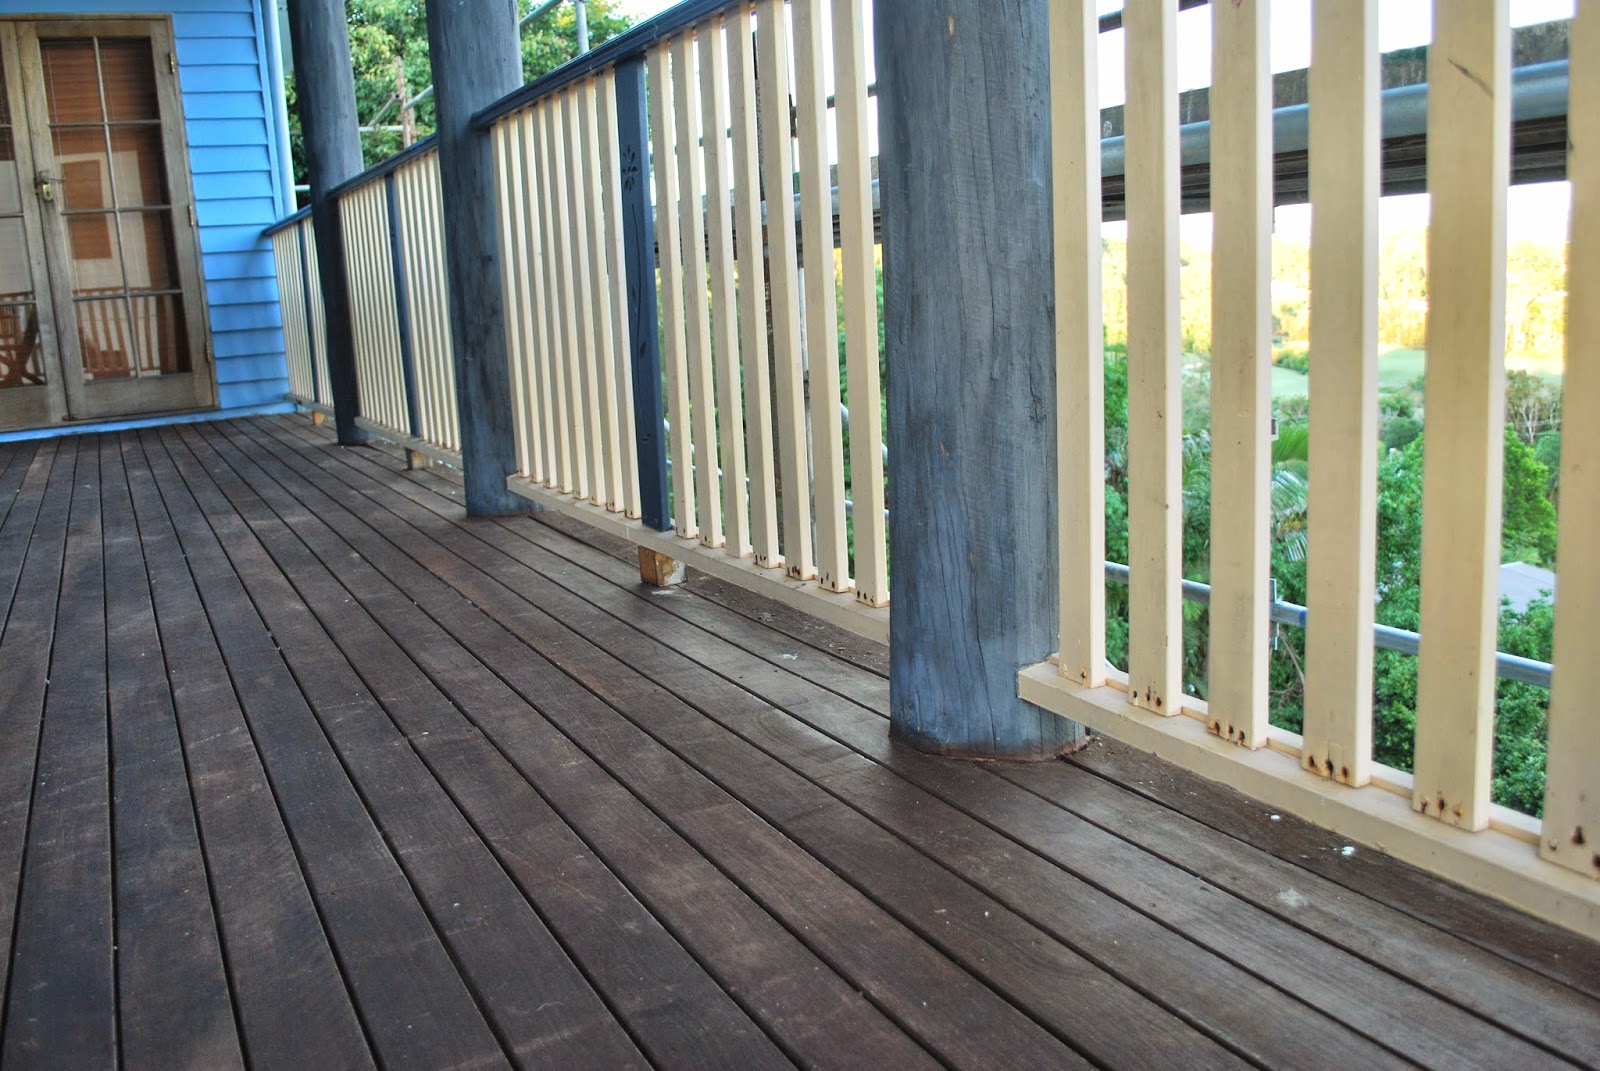
We made a last minute decision to paint the upstairs back verandah railings over the long weekend. Even though we LOVED the front ones after they were painted we couldn't get started again. And now the roof had beautiful white paint!


There were 2 major problems, apart from needing to bring ourselves to face painting railings again-they are time consuming and fiddly!
1) The height-it's almost 3 stories up, which made it difficult to paint the far side
2) The railings weren't painted the right way the first time, meaning they weren't properly sealed. Which meant that water had made it in rusting out screws and nails. And potentially rotten wood.


Late last week we realised if we were going to do them, we needed to paint them now while the scaffolding was up. First we gave them a hit with a hammer to see if any of the boards were loose, and screwed any in that needed it, and replaced a few that were a bit too rotten.

While I was at work L scraped out the old rust stained putty, and re puttied the holes.


The next day he  sanded, and put a little paint over the new putty so he could wash the railings down.

Then we painted. We kind of worked together to minimise drips. He did the back and one side, I did the front and the other side.


Gaps
After the first coat had dried L used gap filler to try to minimise more water getting in and tidy up the edges.
No gaps
Eventually we will need to replace these railings due to the water damage, but they should last a few years. We will just keep a close eye on them, and also hope the rust doesn't seep through and stain the putty again!


Before-very old befores!


I won't put an after-our verandah looks like a bit of a bomb site, it's dirty and messy, we still have a hole in the eaves and we haven't painted the walls yet.

*If you are building railings, paint EVERYTHING before you make it. Including the ends. If you make the railing, and then paint it water gets into the gaps and into the bare wood, causing the wood to rot and the screws to rust.

Sunday 1 June 2014

back to the painting board

After narrowing down our paint choices we bought a sample pot of Sorcerer by Haymes, but it wasn't right when we put it on a big sheet of cardboard. It had a few drops of red tint added, it was too blue and too bright. It wasn't bad, but it wasn't what we were after. If it wasn't what we wanted on a piece of cardboard, a whole house would have been too much.

This was not too concerning, until the painters told us that they could start in a few days, rather than a few weeks!
We have a colour scheme!! Smokeytone.
Sorcerer was close though, so I went in and spoke to the staff at the local paint shop, who were really knowledgeable and helpful. I looked at the paint cards again, and a lot of the colours were throwing a bit purple or green or too blue. They got out the paint deck for us, and we found Smokeytone, which they didn't have on a card in the display. It looked good, and when they put it into the computer it had only black, blue and white tint. It was sounding good. 

It looks quite grey in comparison to the blue walls, but is blue-grey!
After painting it onto some cardboard we both loved it! We will also be having white and navy trim. No more yellow! Or cream!

I was feeling a bit sick about the colour, it's such a big and expensive decision, but I'm now really excited.
Smokeytone and Sorcerer behind
The scaffolding is up, the most of the walls are prepped (they mostly only needed cleaning, and a few small areas needed some minor sanding), and the painting should start on Monday. 

Our house is a LONG way off being painted-the painters are only doing the high, hard bits. L and I will spend a lot of weekends painting the lower parts and the verandahs, but we have a colour, and one day soonish our whole house will be painted!

*Sorry about the photos-its a grey miserable weekend here, hopefully the weather clears up for our painters.


LinkWithin

Related Posts Plugin for WordPress, Blogger...